版本記錄
| 版本號(hào) | 時(shí)間 |
|---|---|
| V1.0 | 2017.06.04 |
前言
YYText是一個(gè)專門處理文字的框架,作者是國內(nèi)的一個(gè)技術(shù)大牛,他有很多框架,還有我們知道的YYModel、YYText、YYCache等,這里我們就先說一下YYText。
一、YYText作者
我們先看一下YYText的作者,以及他的其他框架。

YYText
二、YYText框架特點(diǎn)
YYText具有如下特點(diǎn):
- 兼容UILabel和UITextView API框架
- 高性能異步文字布局和渲染
- CoreText可擴(kuò)展,擁有更多的文字效果
- 具有UIImage,UIView和CALayer富文本效果
- 自定義高亮文字允許用戶交互
- 文本解析器(內(nèi)置markdown/表情解析器)
- 支持文本容器路徑和排除路徑
- 支持垂直表單布局(對(duì)于CJK文本)
- 支持圖像和特性文字的粘貼和賦值
- 支持特性文字占位符
- 支持自定義鍵盤視圖
- 撤銷和重新控制
- 支持特性文字的歸檔和解檔
- 支持多語言和VoiceOver
- 支持Interface Builder
- 技術(shù)文檔齊備
三、YYText vs TextKit結(jié)構(gòu)
下面我們看一下這兩種框架的結(jié)構(gòu)。

YYText vs TextKit結(jié)構(gòu)
四、YYText支持的文本特性
1.YYText原生支持的特性
示例1

示例1
示例2

示例2
示例3

示例3
示例4

示例4
示例5

示例5
示例6

示例6
示例7

示例7
示例8

示例8-1

示例8-2

示例8-3
2.YYText 支持的 CoreText 屬性
<tr>
<td></td>
<td> TextAlignment </td>
<td> NSParagraphStyle <br/>(NSTextAlignment) </td>
</tr>
<tr>
<td>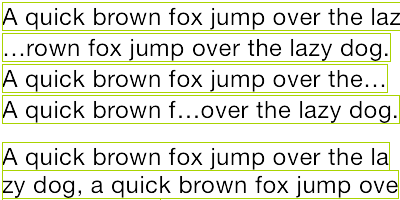</td>
<td> LineBreakMode </td>
<td> NSParagraphStyle <br/>(NSLineBreakMode) </td>
</tr>
<tr>
<td>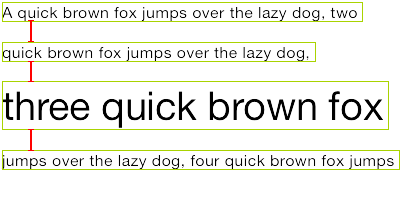</td>
<td> LineSpacing </td>
<td> NSParagraphStyle <br/>(CGFloat) </td>
</tr>
<tr>
<td>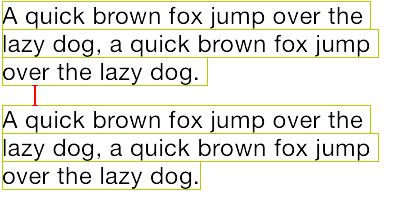</td>
<td> ParagraphSpacing <br/> ParagraphSpacingBefore </td>
<td> NSParagraphStyle <br/>(CGFloat) </td>
</tr>
<tr>
<td>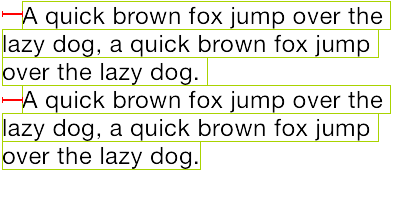</td>
<td> FirstLineHeadIndent </td>
<td> NSParagraphStyle <br/>(CGFloat) </td>
</tr>
<tr>
<td>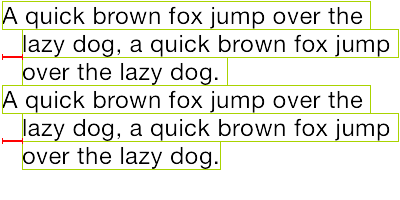</td>
<td> HeadIndent </td>
<td> NSParagraphStyle <br/>(CGFloat) </td>
</tr>
<tr>
<td>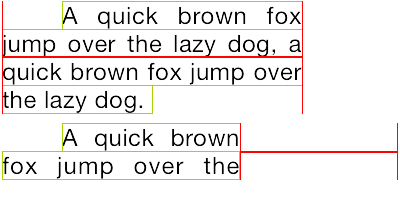</td>
<td> TailIndent </td>
<td> NSParagraphStyle <br/>(CGFloat) </td>
</tr>
<tr>
<td>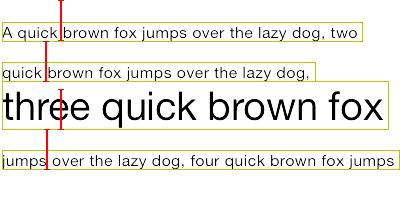</td>
<td> MinimumLineHeight </td>
<td> NSParagraphStyle <br/>(CGFloat) </td>
</tr>
<tr>
<td>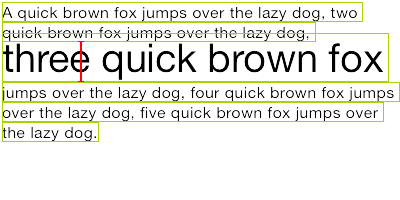</td>
<td> MaximumLineHeight </td>
<td> NSParagraphStyle <br/>(CGFloat) </td>
</tr>
<tr>
<td>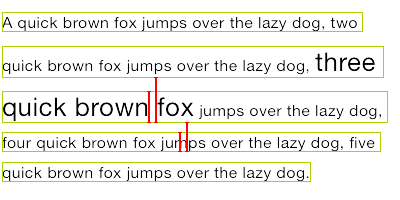</td>
<td> LineHeightMultiple </td>
<td> NSParagraphStyle <br/>(CGFloat) </td>
</tr>
<tr>
<td>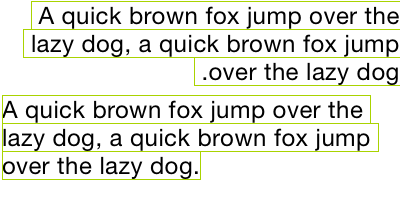</td>
<td> BaseWritingDirection </td>
<td> NSParagraphStyle <br/>(NSWritingDirection) </td>
</tr>
<tr>
<td>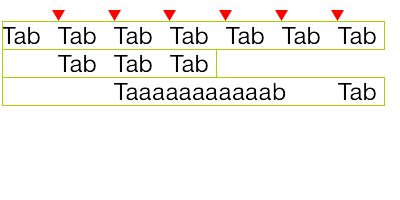</td>
<td> DefaultTabInterval <br/> TabStops </td>
<td> NSParagraphStyle <br/>CGFloat/NSArray(NSTextTab)</td>
</tr>
下面是效果圖

示例圖

示例圖

示例圖
五、YYText用法
1. 基本用法
// YYLabel (和 UILabel 用法一致)
YYLabel *label = [YYLabel new];
label.frame = ...
label.font = ...
label.textColor = ...
label.textAlignment = ...
label.lineBreakMode = ...
label.numberOfLines = ...
label.text = ...

// YYTextView (和 UITextView 用法一致)
YYTextView *textView = [YYTextView new];
textView.frame = ...
textView.font = ...
textView.textColor = ...
textView.dataDetectorTypes = ...
textView.placeHolderText = ...
textView.placeHolderTextColor = ...
textView.delegate = ...
2. 屬性文本
// 1. 創(chuàng)建一個(gè)屬性文本
NSMutableAttributedString *text = [[NSMutableAttributedString alloc] initWithString:@"Some Text, blabla..."];

// 2. 為文本設(shè)置屬性
text.yy_font = [UIFont boldSystemFontOfSize:30];
text.yy_color = [UIColor blueColor];
[text yy_setColor:[UIColor redColor] range:NSMakeRange(0, 4)];
text.yy_lineSpacing = 10;

// 3. 賦值到 YYLabel 或 YYTextView
YYLabel *label = [YYLabel new];
label.frame = ...
label.attributedString = text;

YYTextView *textView = [YYTextView new];
textView.frame = ...
textView.attributedString = text;
3. 文本高亮
你可以用一些已經(jīng)封裝好的簡便方法來設(shè)置文本高亮:
[text yy_setTextHighlightRange:range
                        color:[UIColor blueColor]
              backgroundColor:[UIColor grayColor]
                    tapAction:^(UIView *containerView, NSAttributedString *text, NSRange range, CGRect rect){
                        NSLog(@"tap text range:...");
                    }];
或者用更復(fù)雜的辦法來調(diào)節(jié)文本高亮的細(xì)節(jié):
// 1. 創(chuàng)建一個(gè)"高亮"屬性,當(dāng)用戶點(diǎn)擊了高亮區(qū)域的文本時(shí),"高亮"屬性會(huì)替換掉原本的屬性
YYTextBorder *border = [YYTextBorder borderWithFillColor:[UIColor grayColor] cornerRadius:3];

YYTextHighlight *highlight = [YYTextHighlight new];
[highlight setColor:[UIColor whiteColor]];
[highlight setBackgroundBorder:highlightBorder];
highlight.tapAction = ^(UIView *containerView, NSAttributedString *text, NSRange range, CGRect rect) {
  NSLog(@"tap text range:...");
  // 你也可以把事件回調(diào)放到 YYLabel 和 YYTextView 來處理。
};

// 2. 把"高亮"屬性設(shè)置到某個(gè)文本范圍
[attributedText yy_setTextHighlight:highlight range:highlightRange];

// 3. 把屬性文本設(shè)置到 YYLabel 或 YYTextView
YYLabel *label = ...
label.attributedText = attributedText

YYTextView *textView = ...
textView.attributedText = ...

// 4. 接受事件回調(diào)
label.highlightTapAction = ^(UIView *containerView, NSAttributedString *text, NSRange range, CGRect rect) {
    NSLog(@"tap text range:...");
};
label.highlightLongPressAction = ^(UIView *containerView, NSAttributedString *text, NSRange range, CGRect rect) {
    NSLog(@"long press text range:...");
};

@UITextViewDelegate
- (void)textView:(YYTextView *)textView didTapHighlight:(YYTextHighlight *)highlight inRange:(NSRange)characterRange rect:(CGRect)rect {
    NSLog(@"tap text range:...");
}
- (void)textView:(YYTextView *)textView didLongPressHighlight:(YYTextHighlight *)highlight inRange:(NSRange)characterRange rect:(CGRect)rect {
    NSLog(@"long press text range:...");
}
4. 圖文混排
NSMutableAttributedString *text = [NSMutableAttributedString new];
UIFont *font = [UIFont systemFontOfSize:16];
NSMutableAttributedString *attachment = nil;

// 嵌入 UIImage
UIImage *image = [UIImage imageNamed:@"dribbble64_imageio"];
attachment = [NSMutableAttributedString yy_attachmentStringWithContent:image contentMode:UIViewContentModeCenter attachmentSize:image.size alignToFont:font alignment:YYTextVerticalAlignmentCenter];
[text appendAttributedString: attachment];

// 嵌入 UIView
UISwitch *switcher = [UISwitch new];
[switcher sizeToFit];
attachment = [NSMutableAttributedString yy_attachmentStringWithContent:switcher contentMode:UIViewContentModeBottom attachmentSize:switcher.size alignToFont:font alignment:YYTextVerticalAlignmentCenter];
[text appendAttributedString: attachment];

// 嵌入 CALayer
CASharpLayer *layer = [CASharpLayer layer];
layer.path = ...
attachment = [NSMutableAttributedString yy_attachmentStringWithContent:layer contentMode:UIViewContentModeBottom attachmentSize:switcher.size alignToFont:font alignment:YYTextVerticalAlignmentCenter];
[text appendAttributedString: attachment];
5. 文本布局計(jì)算
NSAttributedString *text = ...
CGSize size = CGSizeMake(100, CGFLOAT_MAX);
YYTextLayout *layout = [YYTextLayout layoutWithContainerSize:size text:text];

// 獲取文本顯示位置和大小
layout.textBoundingRect; // get bounding rect
layout.textBoundingSize; // get bounding size

 // 查詢文本排版結(jié)果
[layout lineIndexForPoint:CGPointMake(10,10)];
[layout closestLineIndexForPoint:CGPointMake(10,10)];
[layout closestPositionToPoint:CGPointMake(10,10)];
[layout textRangeAtPoint:CGPointMake(10,10)];
[layout rectForRange:[YYTextRange rangeWithRange:NSMakeRange(10,2)]];
[layout selectionRectsForRange:[YYTextRange rangeWithRange:NSMakeRange(10,2)]];

// 顯示文本排版結(jié)果
YYLabel *label = [YYLabel new];
label.size = layout.textBoundingSize;
label.textLayout = layout;
6. 文本行位置調(diào)整
// 由于中文、英文、Emoji 等字體高度不一致,或者富文本中出現(xiàn)了不同字號(hào)的字體,
// 可能會(huì)造成每行文字的高度不一致。這里可以添加一個(gè)修改器來實(shí)現(xiàn)固定行高,或者自定義文本行位置。

// 簡單的方法:
// 1. 創(chuàng)建一個(gè)文本行位置修改類,實(shí)現(xiàn) `YYTextLinePositionModifier` 協(xié)議。
// 2. 設(shè)置到 Label 或 TextView。

YYTextLinePositionSimpleModifier *modifier = [YYTextLinePositionSimpleModifier new];
modifier.fixedLineHeight = 24;

YYLabel *label = [YYLabel new];
label.linePositionModifier = modifier;

// 完全控制:
YYTextLinePositionSimpleModifier *modifier = [YYTextLinePositionSimpleModifier new];
modifier.fixedLineHeight = 24;

YYTextContainer *container = [YYTextContainer new];
container.size = CGSizeMake(100, CGFLOAT_MAX);
container.linePositionModifier = modifier;

YYTextLayout *layout = [YYTextLayout layoutWithContainer:container text:text];
YYLabel *label = [YYLabel new];
label.size = layout.textBoundingSize;
label.textLayout = layout;
7. 異步排版和渲染
// 如果你在顯示字符串時(shí)有性能問題,可以這樣開啟異步模式:
YYLabel *label = ...
label.displaysAsynchronously = YES;

// 如果需要獲得最高的性能,你可以在后臺(tái)線程用 `YYTextLayout` 進(jìn)行預(yù)排版:
YYLabel *label = [YYLabel new];
label.displaysAsynchronously = YES; //開啟異步繪制
label.ignoreCommonProperties = YES; //忽略除了 textLayout 之外的其他屬性

dispatch_async(dispatch_get_global_queue(DISPATCH_QUEUE_PRIORITY_DEFAULT, 0), ^{
    // 創(chuàng)建屬性字符串
    NSMutableAttributedString *text = [[NSMutableAttributedString alloc] initWithString:@"Some Text"];
    text.yy_font = [UIFont systemFontOfSize:16];
    text.yy_color = [UIColor grayColor];
    [text yy_setColor:[UIColor redColor] range:NSMakeRange(0, 4)];

    // 創(chuàng)建文本容器
    YYTextContainer *container = [YYTextContainer new];
    container.size = CGSizeMake(100, CGFLOAT_MAX);
    container.maximumNumberOfRows = 0;

    // 生成排版結(jié)果
    YYTextLayout *layout = [YYTextLayout layoutWithContainer:container text:text];

    dispatch_async(dispatch_get_main_queue(), ^{
        label.size = layout.textBoundingSize;
        label.textLayout = layout;
    });
});
8. 文本容器控制
YYLabel *label = ...
label.textContainerPath = [UIBezierPath bezierPathWith...];
label.exclusionPaths =  @[[UIBezierPath bezierPathWith...];,...];
label.textContainerInset = UIEdgeInsetsMake(...);
label.verticalForm = YES/NO;

YYTextView *textView = ...
textView.exclusionPaths =   @[[UIBezierPath bezierPathWith...];,...];
textView.textContainerInset = UIEdgeInsetsMake(...);
textView.verticalForm = YES/NO;
9. 文本解析
// 1. 創(chuàng)建一個(gè)解析器

// 內(nèi)置簡單的表情解析
YYTextSimpleEmoticonParser *parser = [YYTextSimpleEmoticonParser new];
NSMutableDictionary *mapper = [NSMutableDictionary new];
mapper[@":smile:"] = [UIImage imageNamed:@"smile.png"];
mapper[@":cool:"] = [UIImage imageNamed:@"cool.png"];
mapper[@":cry:"] = [UIImage imageNamed:@"cry.png"];
mapper[@":wink:"] = [UIImage imageNamed:@"wink.png"];
parser.emoticonMapper = mapper;

// 內(nèi)置簡單的 markdown 解析
YYTextSimpleMarkdownParser *parser = [YYTextSimpleMarkdownParser new];
[parser setColorWithDarkTheme];

// 實(shí)現(xiàn) `YYTextParser` 協(xié)議的自定義解析器
MyCustomParser *parser = ...

// 2. 把解析器添加到 YYLabel 或 YYTextView
YYLabel *label = ...
label.textParser = parser;

YYTextView *textView = ...
textView.textParser = parser;
10. Debug
// 設(shè)置一個(gè)全局的 debug option 來顯示排版結(jié)果。
YYTextDebugOption *debugOptions = [YYTextDebugOption new];
debugOptions.baselineColor = [UIColor redColor];
debugOptions.CTFrameBorderColor = [UIColor redColor];
debugOptions.CTLineFillColor = [UIColor colorWithRed:0.000 green:0.463 blue:1.000 alpha:0.180];
debugOptions.CGGlyphBorderColor = [UIColor colorWithRed:1.000 green:0.524 blue:0.000 alpha:0.200];
[YYTextDebugOption setSharedDebugOption:debugOptions];
六、YYText安裝
1. CocoaPods
1. 在 Podfile 中添加 pod 'YYText'。
2. 執(zhí)行 pod install 或 pod update。
3. 導(dǎo)入 <YYText/YYText.h>。
2. Carthage
1. 在 Cartfile 中添加 github "ibireme/YYText"。
2. 執(zhí)行 carthage update --platform ios 并將生成的 framework 添加到你的工程。
3. 導(dǎo)入 <YYText/YYText.h>。
3. 手動(dòng)安裝
1. 下載 YYText 文件夾內(nèi)的所有內(nèi)容。
2. 將 YYText 內(nèi)的源文件添加(拖放)到你的工程。
3. 鏈接以下 frameworks:
      - UIKit
      - CoreFoundation
      - CoreText
      - QuartzCore
      - Accelerate
      - MobileCoreServices
4. 導(dǎo)入 YYText.h。
注意
你可以添加 YYImage 或 YYWebImage 到你的工程,以支持動(dòng)畫格式(GIF/APNG/WebP)的圖片。
七、系統(tǒng)要求
該項(xiàng)目最低支持 iOS 6.0 和 Xcode 7.0。
八、已知問題
- YYText 并不能支持所有 CoreText/TextKit 的屬性,比如 NSBackgroundColor、NSStrikethrough、NSUnderline、NSAttachment、NSLink 等,但 YYText 中基本都有對(duì)應(yīng)屬性作為替代。詳情見上方表格。
- YYTextView 未實(shí)現(xiàn)局部刷新,所以在輸入和編輯大量的文本(比如超過大概五千個(gè)漢字、或大概一萬個(gè)英文字符)時(shí)會(huì)出現(xiàn)較明顯的卡頓現(xiàn)象。
- 豎排版時(shí),添加 exclusionPaths 在少數(shù)情況下可能會(huì)導(dǎo)致文本顯示空白。
- 當(dāng)添加了非矩形的 textContainerPath,并且有嵌入大于文本排版方向?qū)挾鹊?RunDelegate 時(shí),RunDelegate 之后的文字會(huì)無法顯示。這是 CoreText 的 Bug(或者說是 Feature)。
后記
未完,待續(xù),后續(xù)會(huì)完善~~~~

奮斗
