前言
在ios8.3中,UIAlertView與UIActionSheet已經被列為不建議使用的范疇,按照蘋果果斷的性格,兩個大版本之后就會被淘汰,現在建議使用UIAlertController去替代這兩個方法。
回顧UIAlertView與UIActionSheet
- 創建方法
UIAlertView 創建方法
    UIAlertView *alert = [[UIAlertView alloc] initWithTitle:@"title"
                                                   message:@"alert message"
                                                  delegate:self
                                         cancelButtonTitle:@"ok"
                                         otherButtonTitles:@"one", @"two", nil];
   [alert show];
UIActionSheet 創建方法
UIActionSheet *actionSheet
          = [[UIActionSheet alloc] initWithTitle:@"title"
                                        delegate:self
                               cancelButtonTitle:@"cancel"
                          destructiveButtonTitle:@"destructive"
                               otherButtonTitles:@"one", @"two", nil];
          [actionSheet showInView:self.view.window];
有次可見UIActionSheet與UIAlertView創建方法幾乎完全相同。
2 . 代理
UIAlertView的代理經常會隨著UIAlertView的創建一并用到,而它最常用的代理應該是在點擊UIAlertView中button所要響應事件的代理。
//點擊時
-(void)alertView:(UIAlertView *)alertView clickedButtonAtIndex:(NSInteger)buttonIndex
{
        //讀取名字
        NSString *buttonTitle = [alertView buttonTitleAtIndex:buttonIndex];
        if ([buttonTitle isEqualToString:@"one"]) {

        }

}
在點擊UIAlertView上面的button,根據button所在的位置得到button的信息,比如名字,再在確認后實現方法。
UIAlertController
1 .創建UIAlertController方法
UIAlertController *uiAlertController=
 [UIAlertController alertControllerWithTitle:@"title"
 message:@"message"
 preferredStyle:UIAlertControllerStyleAlert];
 [self presentViewController:uiAlertController animated:YES completion:nil];
顧名思義,title與message與之前一樣,展示方式有所不同,更主要的是現在創建的時候多了一個preferredStyle屬性。
typedef NS_ENUM(NSInteger, UIAlertControllerStyle) {
    UIAlertControllerStyleActionSheet = 0,
    UIAlertControllerStyleAlert } NS_ENUM_AVAILABLE_IOS(8_0);
在preferredStyle中一共有兩種方法,UIAlertControllerStyleActionSheet與UIAlertControllerStyleAlert,分別取代了UIActionSheet和UIAlertView。
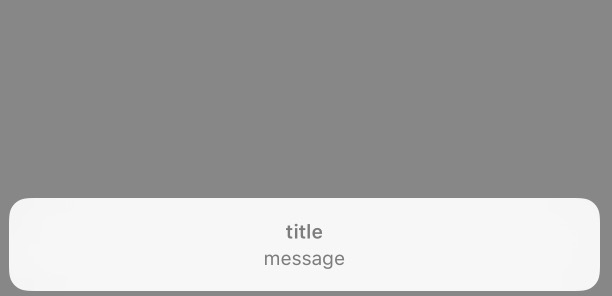
UIAlertControllerStyleAlert示例

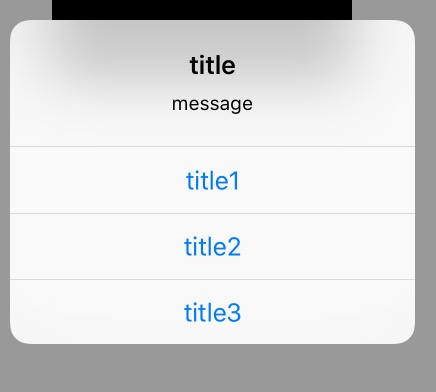
UIAlertControllerStyleActionSheet示例
可以看出,創建的UIAlertController與 沒有 button的UIActionSheet和UIAlertView是可以完全替換的,現在怎樣在UIAlertController中添加button呢?這時候我們需要用到UIAlertAction。
UIAlertAction
2 .添加UIAlertAction
(以下UIAlertAction都不以特定的方式展示)
- 創建UIAlertAction
  UIAlertAction *action=[UIAlertAction actionWithTitle:@"title" style:UIAlertActionStyleDefault handler:nil];
    [uiAlertController addAction:action];
創建UIAlertAction中,title就是按鈕的名字,style是指UIAlertAction的類型,handler就是點擊按鈕時所要處理的事件。
最后最重要的是要想在UIAlertController中添加UIAlertAction,就需要實現addAction方法。
- UIAlertActionStyle
與UIAlertController一樣,UIAlertAction的Style也不是唯一的。
typedef NS_ENUM(NSInteger, UIAlertActionStyle) {
    UIAlertActionStyleDefault = 0,
    UIAlertActionStyleCancel,
    UIAlertActionStyleDestructive
} NS_ENUM_AVAILABLE_IOS(8_0);
一共有三個,分別是UIAlertActionStyleDefault(默認),UIAlertActionStyleCancel(取消),UIAlertActionStyleDestructive(重要)。
分別試試不同style的效果。
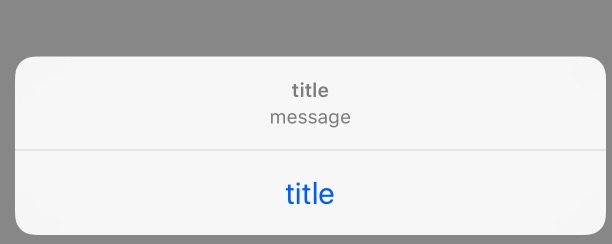
UIAlertActionStyleDefault與UIAlertActionStyleCancel:
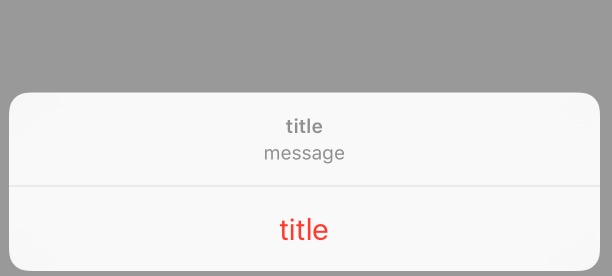
UIAlertActionStyleDestructive:
在點擊按鈕之后UIAlertController一樣都會消失。
- UIAlertAction的順序
UIAlertAction的順序只根據在UIAlertController添加的次序排序,與 UIAlertAction創建時間順序無關。(UIAlertActionStyleCancel的UIAlertAction的列外,待會會講到)
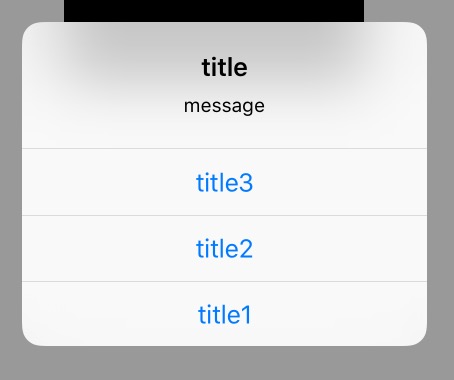
例一:
 UIAlertAction *action1=[UIAlertAction actionWithTitle:@"title1" style:UIAlertActionStyleCancel handler:nil];
    UIAlertAction *action2=[UIAlertAction actionWithTitle:@"title2" style:UIAlertActionStyleDefault handler:nil];
    UIAlertAction *action3=[UIAlertAction actionWithTitle:@"title3" style:UIAlertActionStyleDefault handler:nil];
    [uiAlertController addAction:action1];
    [uiAlertController addAction:action2];
    [uiAlertController addAction:action3];
結果:
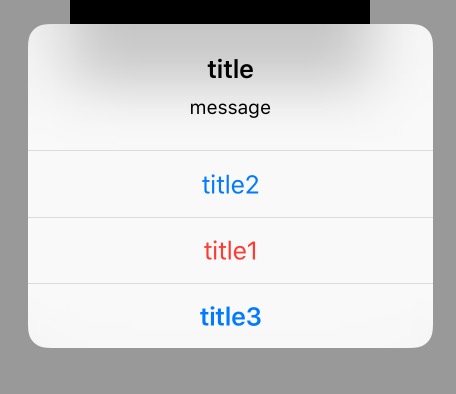
例二:
 UIAlertAction *action1=[UIAlertAction actionWithTitle:@"title1" style:UIAlertActionStyleCancel handler:nil];
    UIAlertAction *action2=[UIAlertAction actionWithTitle:@"title2" style:UIAlertActionStyleDefault handler:nil];
    UIAlertAction *action3=[UIAlertAction actionWithTitle:@"title3" style:UIAlertActionStyleDefault handler:nil];
    [uiAlertController addAction:action3];
    [uiAlertController addAction:action2];
    [uiAlertController addAction:action1];
結果:
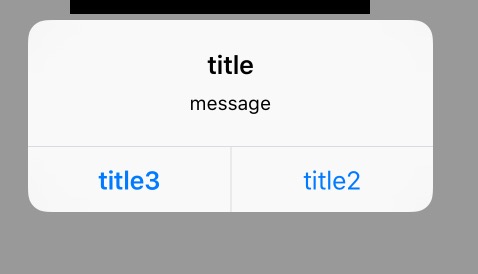
- UIAlertActionStyleCancel
UIAlertActionStyleCancel是UIAlertActionStyle中最特殊的一個。
第一,任何類型的UIAlertViewController中,最多只能有一個UIAlertActionStyleCancel類型的UIAlertAction,如果超過一個,則會報錯。

第二,UIAlertActionStyleCancel類型的UIAlertAction與其他類型的按鈕位置不同,在UIAlertViewController中,UIAlertAction只有等于兩個時,UIAlertActionStyleCancel的位置按著蘋果官方設定,會在左邊。
代碼:
  UIAlertAction *action2=[UIAlertAction actionWithTitle:@"title2" style:UIAlertActionStyleDefault handler:nil];
   UIAlertAction *action3=[UIAlertAction actionWithTitle:@"title3" style:UIAlertActionStyleCancel handler:nil];
   [uiAlertController addAction:action3];
   [uiAlertController addAction:action2];
截圖:
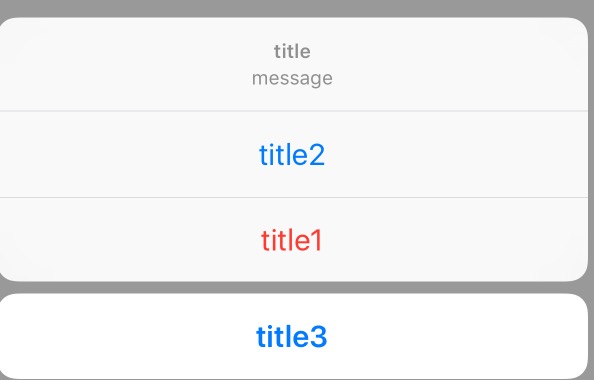
在其他情況中,UIAlertActionStyleCancel類型的UIAlertAction的位置永遠是最底層。
截圖1:
截圖2:
- 實現UIAlertAction中的方法
UIAlertAction *action3=[UIAlertAction actionWithTitle:@"title3" style:UIAlertActionStyleCancel handler:^ (UIAlertAction *action){
       NSLog(@"title3 test ");
   }];
只需要添加一段block即可。
點擊后實現方法:

總結
UIAlertController將以前的方式用模塊化實現,并不需要再使用代理方法去實現功能,定位上也更加靈活。
